

Hi everyone! I wanted to share something fun with you all today. We received The Crossmaker DVD from See The Light and we’ve had such fun with them I wanted to give one to you all to try out!

See The Light Art videos are especially great for those of you who aren’t great at teaching art class! Instead a very nice woman named Pat teaches them for you!
For most classes supplies are fairly basic, typically you just need a piece of copy paper, a #2 pencil, and a good eraser. Some lessons ask for a charcoal pencil, pastels, and a few other basic supplies but nothing out of the ordinary.
What’s included in The Crossmaker?
Dominic, the son of a carpenter, finds himself drawn into the unforgettable trial of the man called Jesus. Share in this amazing adventure that takes Dominic from Christ’s crucifixion to a place of redemption, and a face-to-face meeting with the risen Christ. (16 minutes) SEE THE LIGHT chalk artist Gloria Kohlmann draws her stunning interpretation of the Easter story.
Art Lessons:
- GLORY! See The Light artist Heidi Shorts teaches on the art of Creative Lettering. (28 minutes)
- HIS IS NOT HERE! HE IS RISEN! See The Light Art Club Master Teacher Pat Knepley leads budding young artists in a step-by-step drawing lesson using chalk pastels. Plus, create your own black light reveal! (32 minutes)
- THREE CROSSES ON A HILL. See The Light’s Jim Pence gives a tutorial in water colors as young artists discover The Joy of Art. (25 minutes)
Bonus Features:
- REVEL in the original contemporary music per- formed by “Breathing Room” recording artists Jan Roper and Kevin Dukes while watching Gloria Kohlmann draw her remarkable art expression of the Easter Story.
- WATCH AND HEAR the plan of salvation, clearly and creatively presented as you have never seen it.
- HEAR See The Light chalk artist Gloria Kohlmann’s commentary as you watch the Easter scene being created.
- MEET the See The Light team.
GLORY:
For our first lesson, Glory, we got to use some more exciting things! Fluorescent colored pencils and a black light!

I’m not sure if you can see the computer screen or not, but they do nice close-ups during the lesson so everyone can see what it is they’re supposed to be doing. We often pause the video as well just so everyone has a chance to work without feeling rushed.

The next few images show the progress of our “fancy” lettering lesson:


Everyone did a great job, and I like that they’re working on fancy lettering here. I’ve seen some of these techniques pop up since our lesson in various things such as titles for their story writing, and other creative areas as well.

Then for the pièce de résistance …we got to take our finished products into the dark and shine a black light on them illuminating the fancy “G” in glory and showing off all of our wonderful florescent colored pencils! It was difficult to capture on film, but was definitely a cool touch!

He is not here! He is Risen!
The next lesson we did was the He is not here! He is risen! Lesson. We used the following supplies:
- Chalk Pastels
- Neutral color construction paper
- Tissue for blending
- Pencil,
- Eraser
- Paper Towel for cleaning hands!
- NOTE: Ignore the image of the Junior Artist Cray-Pas, we tried to use these, but they do NOT blend like regular chalk-pastels, so I wouldn’t suggest them for this lesson.

And here we are all ready to go! The computer is sitting on the desk (you can see it in the bottom right corner of this image) so that everyone can see well.

The lesson starts by showing students how to draw the outline for their illustration in pencil, then they slowly start adding chalk pastel colors and work on color blending, highlights and shadows, as well as depth perception.

The great thing about the video lesson is that you can pause it, replay if needed, and then move on when everyone is ready.
Here are some of our pictures in progress…


I suggest having plenty of blending tissues on hand when working with pastels…

Each step adds more color and blending of the pigments to show shaded areas and texture.

Here is one of our finished works…I believe this is Strawberry Shortcake’s illustration:

And here are the excited artists! Everyone was pleased with their final product. And yes, Strawberry Shortcake is holding an extra one because I participated in this lesson! Why should the kids get to have all of the fun?

Of course I have a giveaway below for this fun lesson, but if you can’t wait I also have a discount coupon for you!
Just use Coupon Code: CROSS to get The Crossmaker gift set (Shown below) for just $25.00! (Reg. $29.99)
Coupon code good until February 14, 2013

Would you like to win the Crossmaker DVD for yourself!? Simply fill out the rafflecopter below to enter!
The cross maker would be great to have!
The Crossmaker
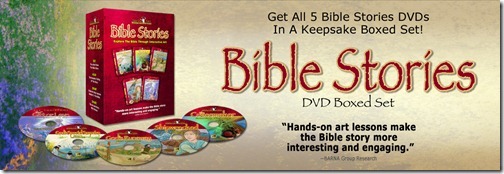
The Bible Stories
The Bible Stories 5 disc set because I can’t choose!
Love them, I like the all. I don’t have any art in my system they look very easy to follow.
The Gift of Love…the one about the Christmas story!
The kids would love the cartooning one. I think Tiffany window looks really neat.
–Gena
How can I pick a favorite when they all look like so much fun! I do like the Crossmaker one. We have been doing the grapevine Ressurection study and it would be a great follow up! I also like the cartooning!
Shipwrecked looks great. They all do. Paper Jungle looks like fun.
in the top picture i see 5 dvd’s but i see that you did 2 lessons/pictures….are there more art lessons or only 2? My son would LOVE this so much ….