

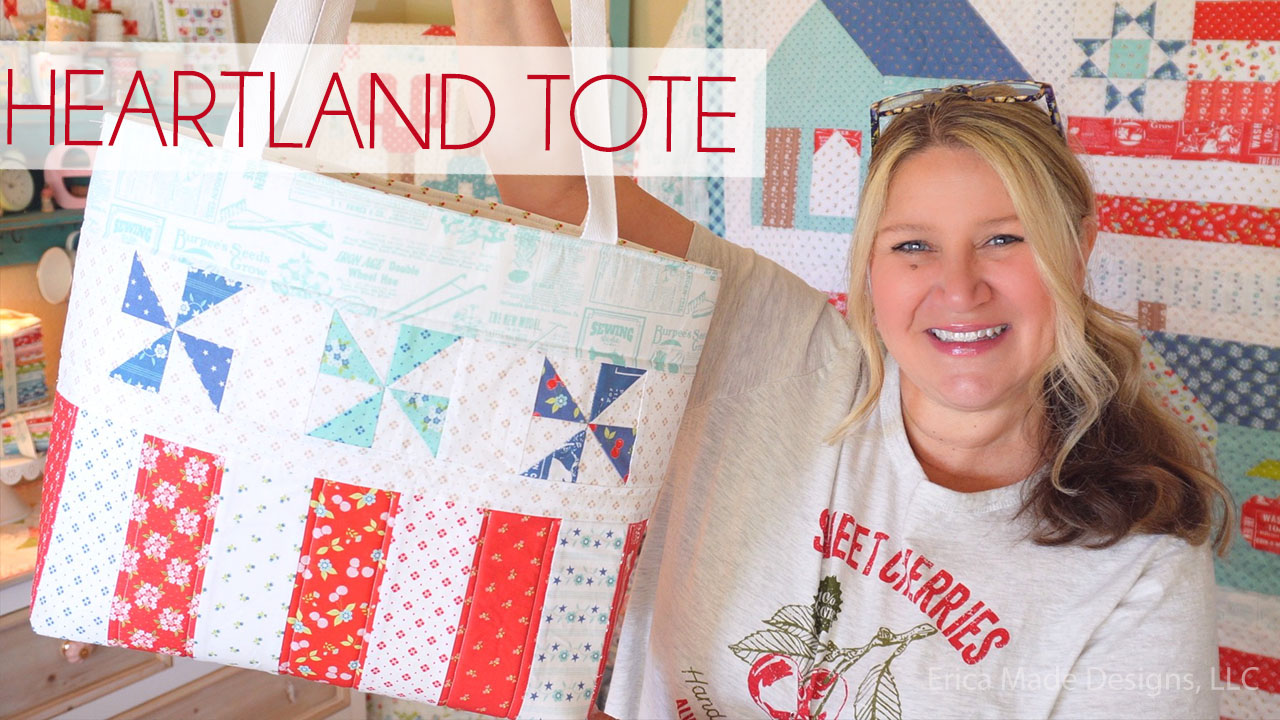
I’m so excited to share my latest project with you — the Heartland Tote Bag! This charming and functional tote is the perfect way to carry a little bit of handmade Americana with you wherever you go. It features classic pinwheel blocks, cheerful red and white stripes, and a sweet patchwork pocket — all brought to life with prints from my Heartland fabric collection.
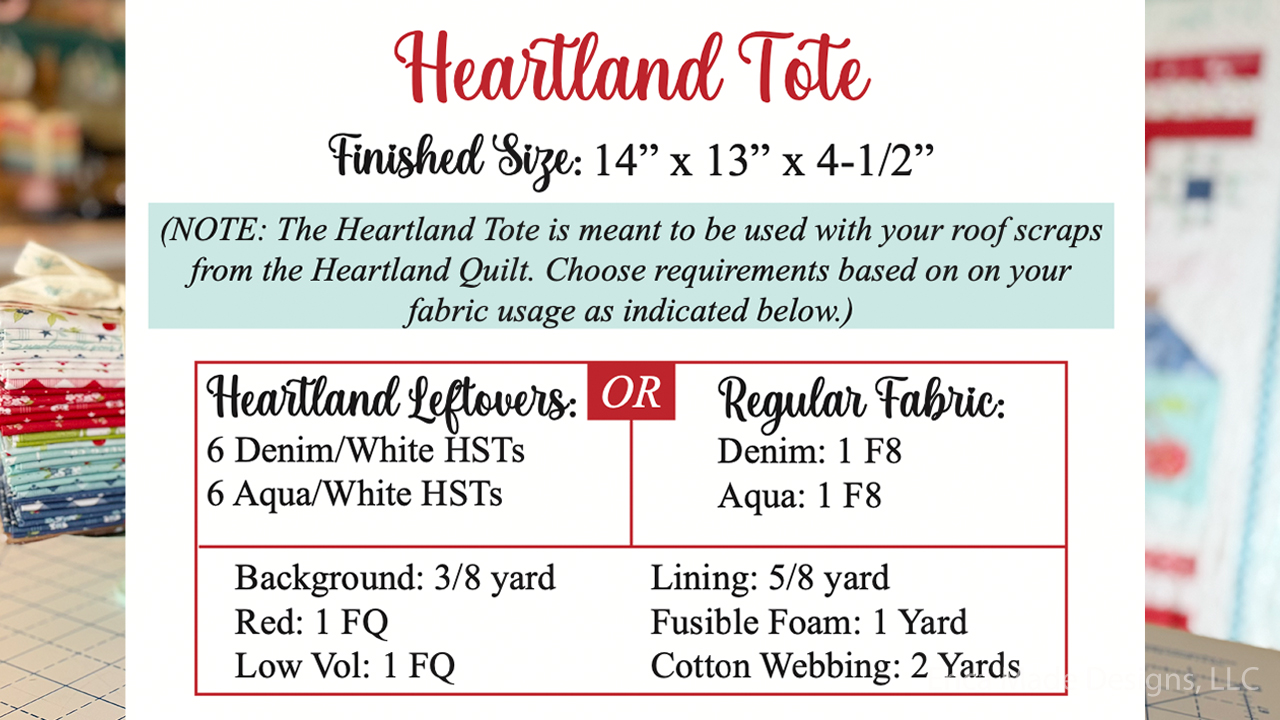
Measuring 14″ tall x 13″ wide x 4-1/2″ deep, the Heartland Tote is just the right size for all your everyday essentials — from sewing projects and books to picnic supplies or market goodies. Whether you’re headed to a quilt retreat or running errands, this bag is as sturdy as it is stylish.
Get the Heartland Tote Pattern here!
Watch the Heartland Tote Video Tutorial here!
One of my favorite things about this tote is that it’s designed to make the most of leftover pieces from the Heartland Quilt project. It’s a great scrap-buster and a fun way to turn those treasured bits into something useful and beautiful. That said, if you haven’t made the Heartland Quilt, the pattern also includes instructions to make this bag from scratch!
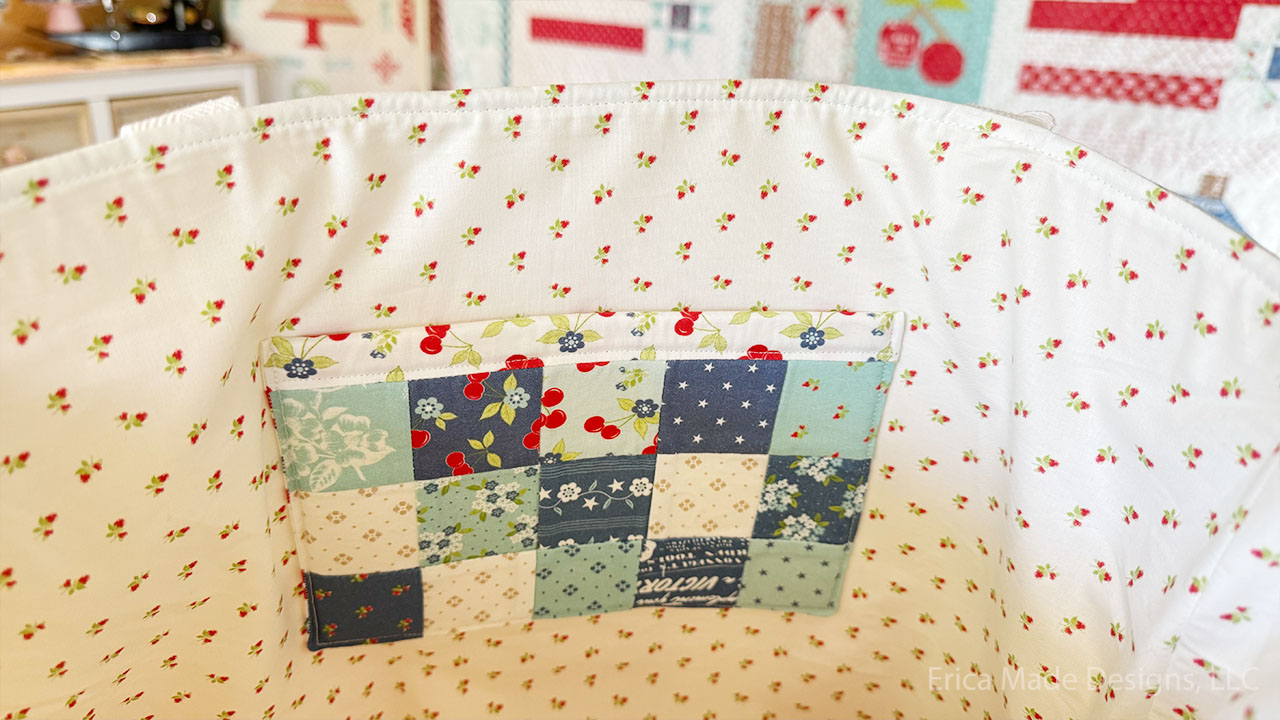
The tote is lined, quilted for extra durability, and features strong cotton webbing handles to keep up with your everyday adventures. I also used my scraps to make a cute patchwork pocket, and don’t forget to add a personalized label to your bag projects! Mine is from the Sweewater Fabric Tagged Subscription.
If you’ve already made the Heartland Quilt, this tote is the perfect follow-up project — and if you haven’t, it just might inspire you to dive into both! You can find the Heartland Tote pattern in my shop, along with the full Heartland fabric collection and quilt kits.
Supplies:

Alternate Options
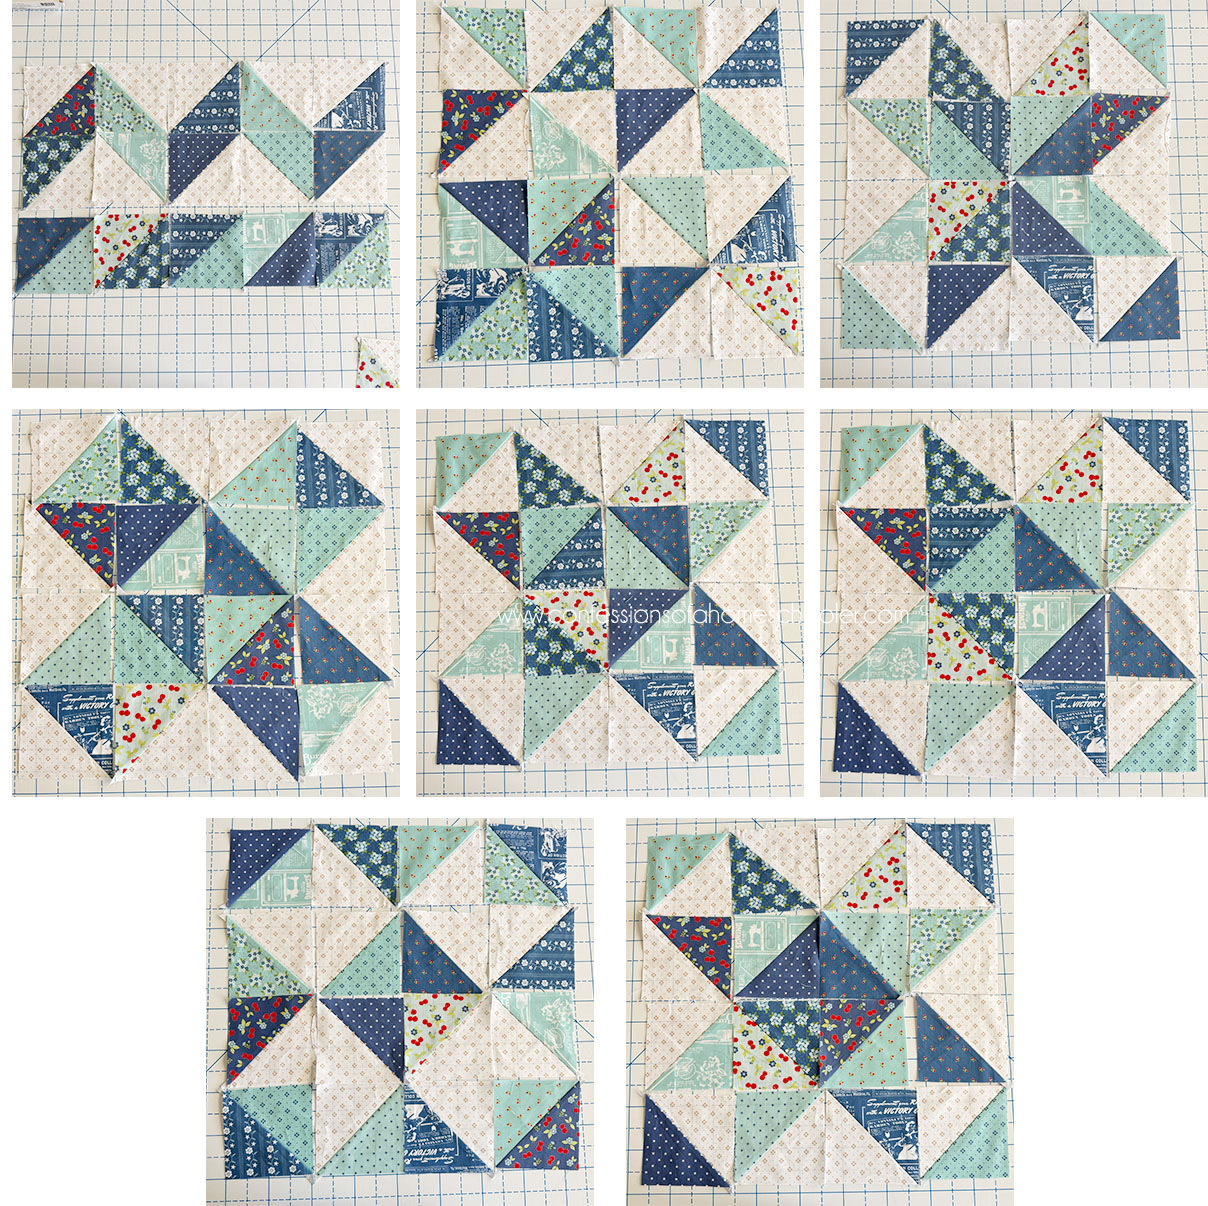
I also wanted to share some fun alternatives if you don’t want to make the heartland tote bag! It’s super easy to use those HSTs to make a cute pillow to go with your quilt! Simply arrange them in any design you like, add some borders and backing, and voila! You have an adorable coordinating Heartland pillow!
Make sure to trim your squares so they’re all the same size. I was able to trim mine to 4″ square which will yield a 14-1/2″ block. Then you can add side and top/bottom borders to make your block whatever size needed for the pillow form size you prefer. Below is a sample assembly for a pillow!
Pillow measurements:
- (16) 4″ x 4″ HSTs (A)
- (2) 3-1/2″ x 14-1/2″ (B)
- (2) 3-1/2″ x 20-1/2″ (C)
Sew the HSTs together in desired design (see below), and trim to 14-1/2″ x 14-1/2″. Add side borders (B) and then top/bottom borders (C). Trim to 20-1/2″ x 20-1/2″ square.
Here are a few ideas to get you started, and if you need help making a pillow, check out my monthly pillow of the month tutorial to show you how to turn any quilt block into a cute pillow!
Happy sewing, friends — and as always, thank you for letting me be a part of your creative journey!
~ Erica