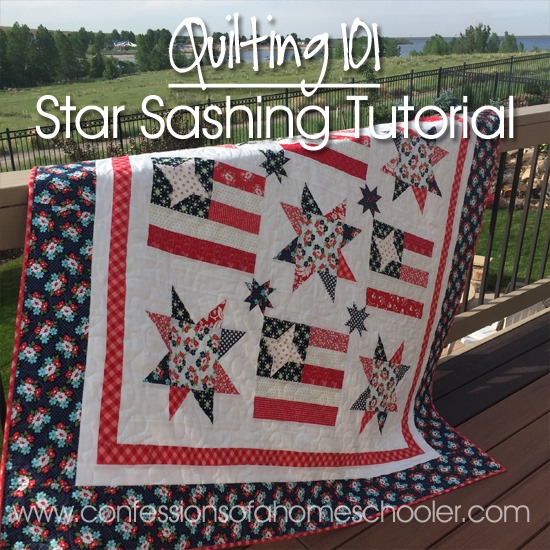
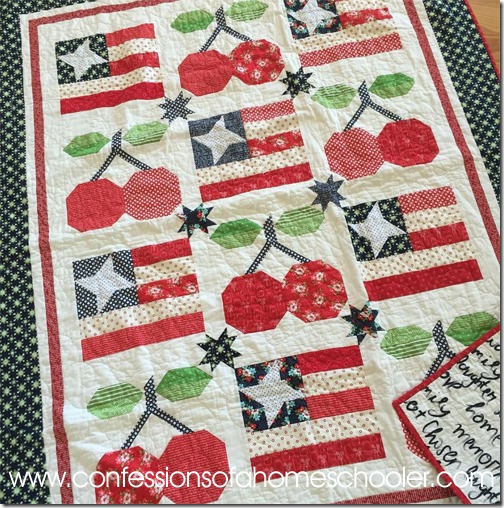
Hey guys! I have a fun tutorial for you. I made this patriotic quilt for my mom this year, and I had so many questions on how I created the star sashing in between my blocks. I put up a tutorial on Instagram, but since that’s kind of hard to find in my feed, I wanted to have one here for you all for easy reference too!
So let’s get started!!
These instructions will show you how to create one of the stars, so you’ll just repeat the process for however many sashing stars you’ll need to fit your quilt.
Step 1:
- Cut as many 2.5” x (Width of your block) strips as you need to go in between your quilt blocks. Your strips will be the length of your unfinished quilt blocks. Since my quilt had 12 – 12.5” square blocks, I cut 17 – 2.5” x 12.5” strips. This will be enough strips to go in between my rows going across, and between the blocks vertically.
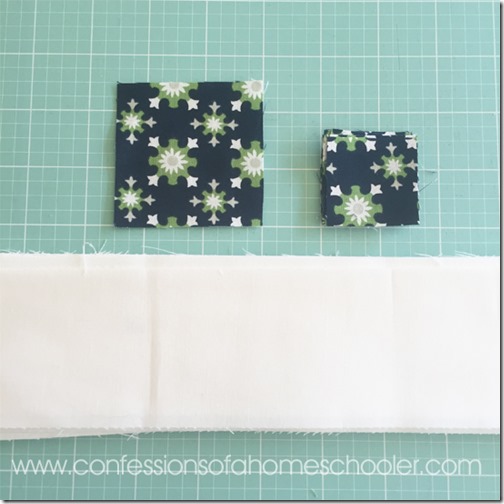
- Cut 1 – 2.5” x 2.5” square for your star center, and 8 – 1.5” x 1.5” squares for the star points. Since I am making 6 sashing blocks, I cut 6 – 2.5” squares for my star centers, and 48 – 1.5” squares for my star points. I used different fabric for each star, but you can make them all the same, scrappy or whatever you like.
Step 2: Draw a diagonal line from corner to corner on the 1.5” squares. (If you don’t feel like drawing lines, you can also finger press or iron the squares in half to create a sew line.)
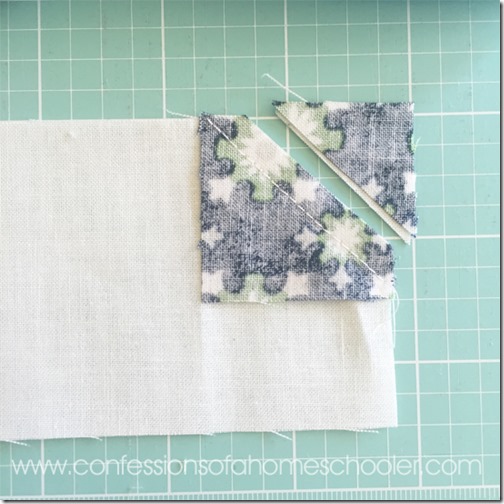
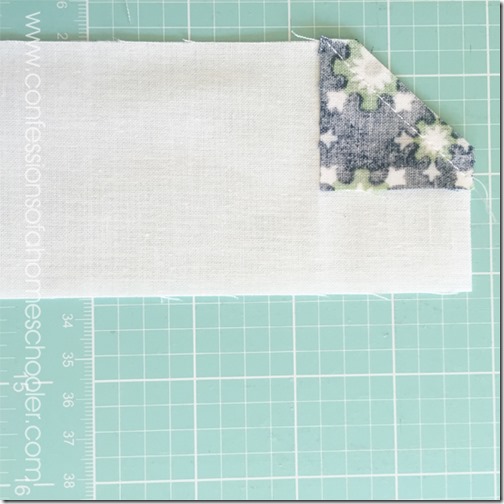
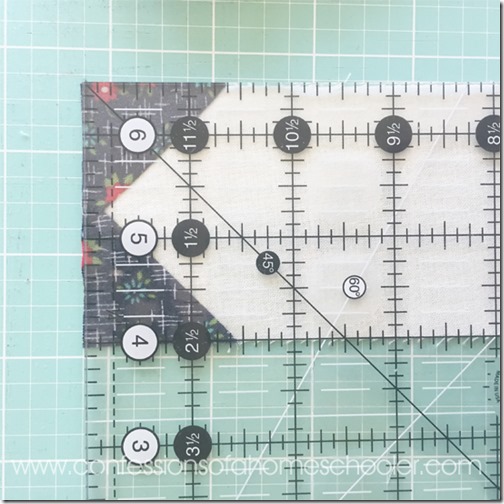
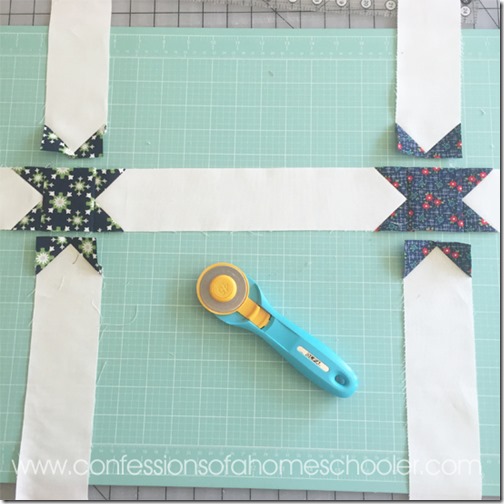
Next place one of the squares on the end of your sashing strip then sew diagonally along the line as shown below. Trim off the corner 1/4” away from your stitch line.
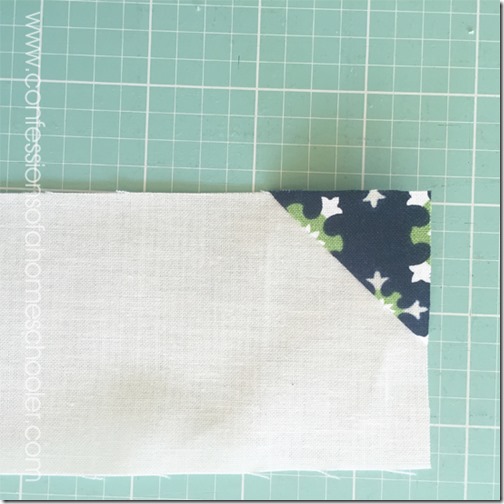
Step 3: Next press your first star tip out like shown below.
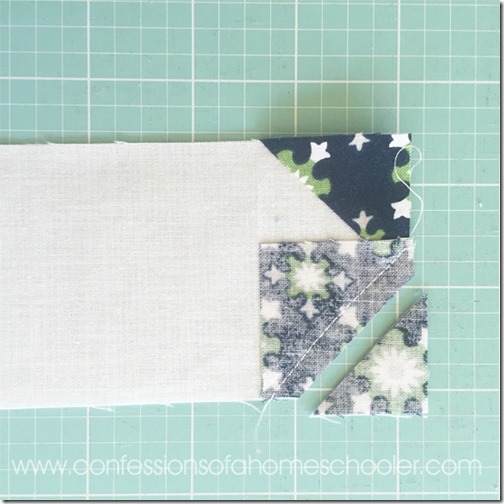
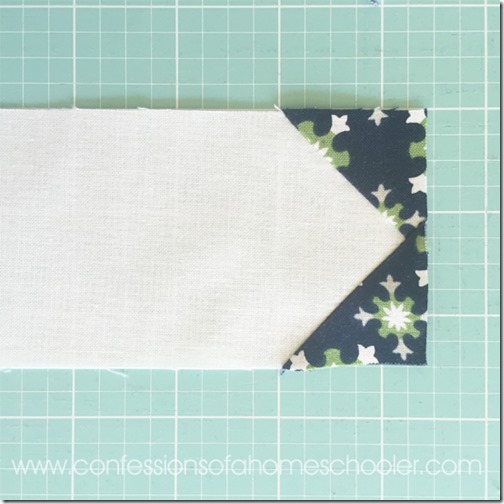
Step 4: Repeat the same process as in Steps 2 and 3 by sewing another 1.5” square along the diagonal on the other side of your sashing strip as shown below. Trim 1/4” away from your stitch line and press open. You’ve just created your first star points!
If your star points got a little wonky you can square up the end of your sashing strip. Just make sure to keep it the same size as the original strip. So mine will trim to 2.5” x 12.5”.
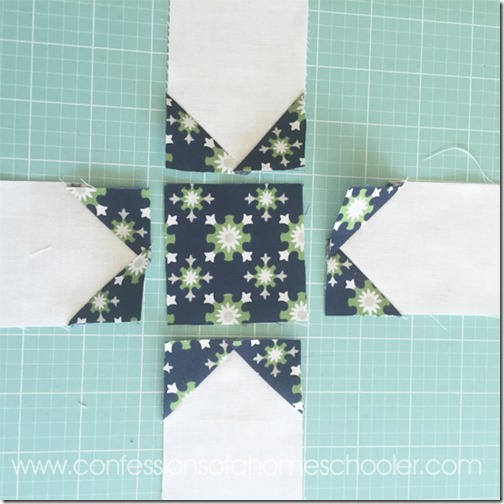
Step 5: Repeat this process to make star points on four of your sashing strips. This is how they should be looking with the center square.
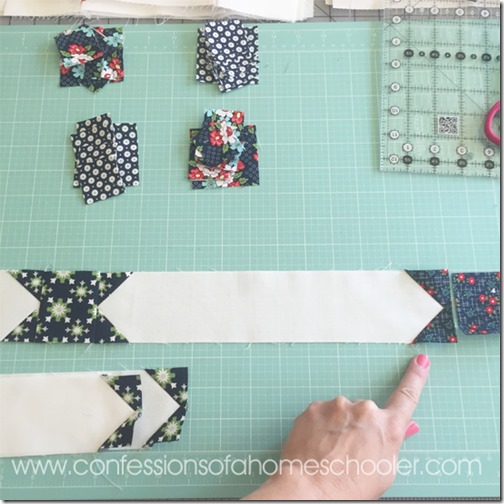
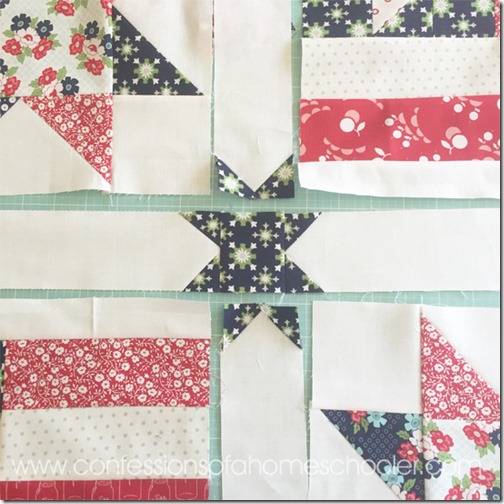
Step 6: Repeat the above steps to continue creating the star points on the ends of your sashing strips. Keep in mind that your center strips will have star points on both ends like in this picture. Since this can get confusing I like to layout the strips and star pieces before moving on. I also like to make one star at a time to keep from getting mixed up.
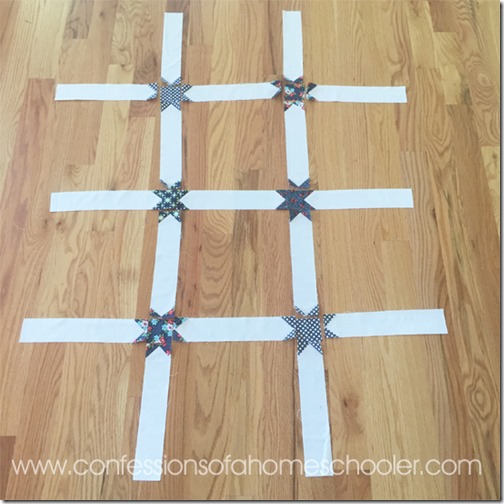
Here is my sashing layout. The blocks will fit nicely into the open spaces between the sashing.
Step 7: Next I like to start by sewing the horizontal sashing strips together like shown.
I sew the vertical ones in between the quilt blocks to create a horizontal row.
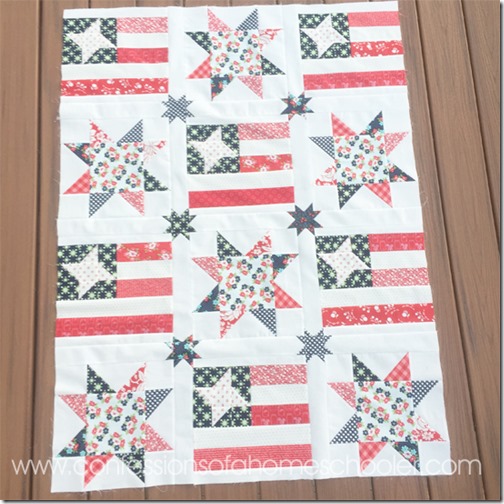
Then assemble the rows together like normal, and voila! You have mini-star sashing!
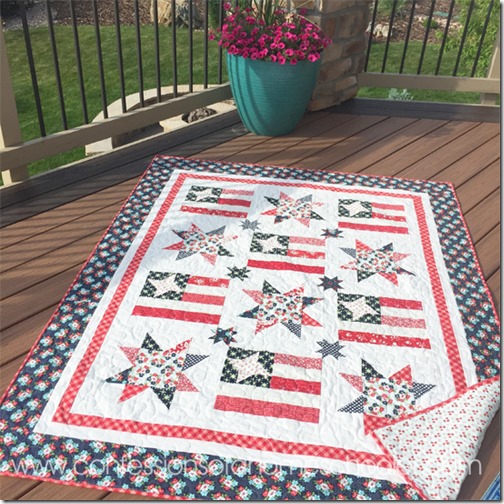
I also added some fun borders to this quilt. Here is what I added:
- Border 1: 2.5” white border
- Border 2: 1.5” red border
- Border 3: 1.5” white border
- Border 4: 5” navy border
Then just add some backing, batting and a little free motion quilting and you’ve got yourself a super cute quilt, with even cuter star sashing! I also made this version using flags and cherries and it’s one of my favorites!
If you’re interested in how to create these exact quilts, here is the 411:
Quilt Pattern: The cherries, flags, and star blocks were created using the 12.5” Pie Cherries Block, Old Glory Block and Simple Star Block from Farm Girl Vintage by Lori Holt. Star Sashing was my own creation (You just read all about how to make it above!)
Fabric: I used a mix of fabrics from the Daysail and Hello Darling collection by Bonnie and Camille for Moda, along with a few pieces of Modern Mini’s by Lori Holt for Riley Blake. My background white is Moda Bella Solid 9900-97. And the back side of my quilt has a fun fabric called Happy Home by Art Gallery Fabric.
Batting: I use Warm N’ White 100% cotton batting
I hope you enjoyed this tutorial, and if it’s inspired you to make star sashing for your own quilt, send me a pic or tag me on social media so I can see what you create!
Here are a few more of my Quilting Tutorials online:
- Pink Pig Rag Quilt
- DIY Tic-Tac-Toe Board Game (*Great for learning beginning skills!)
- Patchwork Book Cover
- Quilt-as-you-go Book Cover
- Kids Pillow with Pocket
- How to Applique’ Basics (Don’t worry it’s super easy!)
- Thread Catcher Tutorial
To keep up with our shenanigans, feel free to follow me:
- YouTube Channel
- Instagram (LOTS of quilty goodness there!)


Great tutorial, is there some way to print it out so I can have it by my sewing machine?
I don’t have it in print format sorry, you could print the blog post I suppose 🙂
Amazing so well done.
Beautiful pattern thank you
Really enjoyed this tutorial
Thanks so much!!!
I’m so happy to find this tutorial…I made my first quilt 14 years ago, using these star cornerstones, but never had the instructions written down.
I want to make 3″ sashing with star cornerstones. What size would my squares be, for my half square triangles? My strips will be 3-1/2″ wide…I’m guessing 2-1/2″ squares for the triangles. Do you agree?
Hi Valerie,
If you are doing 3-1/2″ sashing strips you’ll want 2″ star point squares. Sew one on the diagonal then trim, then add the second one. You can also do 2-1/2″ points but they’ll overlap more, it will still look cute 🙂
This would make a great veterans quilt.