

I’ve recently learned something exciting. Well, exciting for me, and I’m probably behind the curve here, but I’m going to share it anyway! It’s how to de-pot your M.A.C. eye shadows.
Why would you want to do that you ask? I like to have things organized and handy. That same thing goes with homeschooling supplies as well as things like my makeup drawer.
So, since last week I did a post on my favorite eye shadows, today I’m going to show you how to organize your eye shadow!
For those of you who don’t know already, M.A.C. eye shadow comes in pro-palette form, and in the individual pots like below. Last week I showed you my eye shadow collection, and prior to my discovery of the palettes, I had all of those shadows tossed in my make-up drawer. Not a fun thing to dig through each day.
So imagine my excitement when I found out how to de-pot them and add them to one nice neat palette! Being the organizer that I am, I jumped on the chance! But it did look a little scary, so I just wanted to show you all as well. And by the way, this tutorial works on other eye shadows, and blushes with similar packaging!

Supplies:
- Towel
- Knife
- Small piece of waxed-paper
- Hair Straightening Iron
So the first thing to do is open your mac eye shadow pot and using your knife, wedge it carefully between the pot and the shadow part as shown below:

With a little bit of pressure the shadow will pop out of the pot like so…

next place the shadow on a piece of waxed paper on your flat iron for about 20-30 seconds. I have mine on high heat. If you’re curious it’s a CHI straight iron. Love it. Got it FREE during a sale at Ulta.

Once the shadow is warmed, the plastic softens as does the glue holding in the shadow. Carefully take your knife and poke it into the back side of the shadow and press lightly. If you’ve warmed it well, the plastic should be nice and soft and you can easily pop out the shadow from the plastic part. Try not to poke yourself. That’s no fun.

Next use your knife to lift the shadow out of the plastic, be careful as the metal surrounding the shadow will be hot.

Flip the shadow upside down onto your towel and add a small magnet to the backside. Since I’m a homeschooler, I had these All About Spelling magnet tiles handy! Not only are they the perfect size, but also nice and thin which is what you want! If you don’t have some of these, you can also buy a sticky magnetic sheet from your local Wal-mart in the craft section and just cut small pieces as needed.


Next take your empty pot and place that on the waxed paper on the flat iron to loosen the glue holding the name sticker on it.

After about 15 seconds or so, use your knife to lift the sticker from the back of the shadow pot. If you’ve warmed it well, the sticker should lift very easily! Sketch is one of my absolute favorite colors by the way.

Next carefully place the name label over the magnet on the back of your de-potted shadow.
De-potted? Is that a word?

Next put the pot back together and toss it in your bag for “Back-to-Mac” program! For those of you who don’t know, for every 6 containers you bring back to M.A.C. you get 1 FREE lipstick!

So here’s your finished, de-potted shadow from the front and backside…


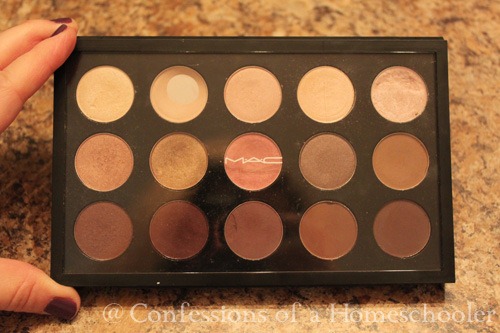
Next repeat this step with any other M.A.C. shadows you might need to de-pot and arrange them in you a M.A.C. Pro-palette for an easy access way to get to all of your fun eye shadows at once! This one holds 15 shadows, but you can remove the insert and put in almost twice as many if you have them!

And here is the completed pretty new palette! And I’m so thankful I don’t have all of these shadows falling all over my drawer anymore.

That was a pain. But not anymore!
So that’s it, I hope in some small way, that might have helped some of you de-clutter your make-up drawer and keep your shadows organized and easy to see!
Have an organizing makeup tip to share? Make sure to leave a comment below!