

Hi everyone! I’ve had a ton of requests for a Jelly Roll Rug tutorial and so I’ve partnered with Roma Quilts to bring you this fun and easy tutorial along with my tips for sewing the Jelly Roll Rug!
Watch my Jelly Roll Rug Tutorial here!
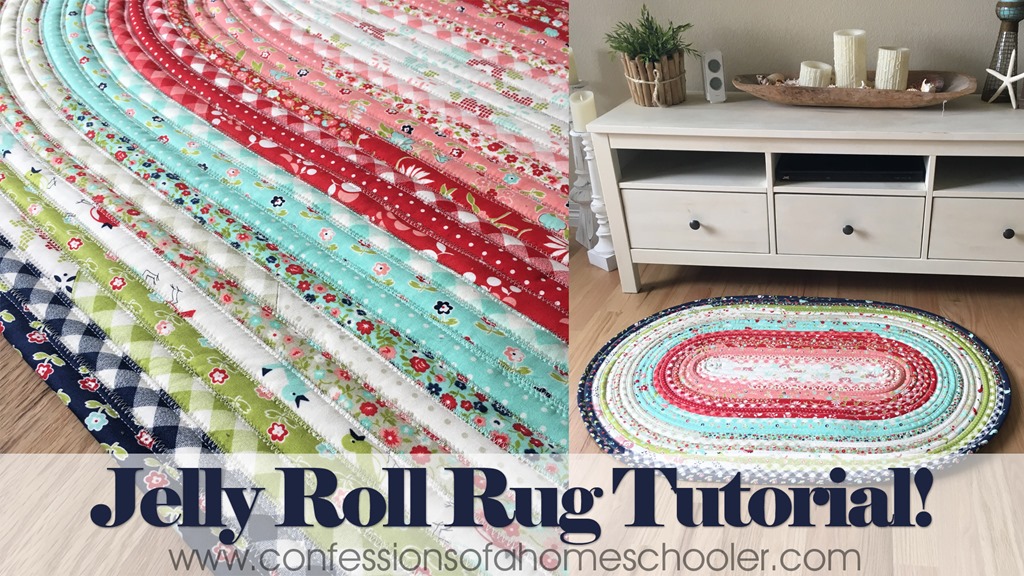
I used 1 Full Jelly Roll and the finished size was approx. 29″ x 44″. But you can use more or less strips depending on what size you want your rug! This pattern is super customizable 🙂
Tips:
- Wavy or bowing Edges: If your edges are wavy you are probably too loose when attaching your new strips. If your rug looks more like a bowl than a rug you are pulling too tight when adding new rows. Try to keep an even tension as you add each new row onto the rug, this will help your rug lay flat.
- Remove the rug from your sewing machine every few rounds and PRESS it and allow to cool flat, then continue on. This will help your rug keep its flat shape.
- Place an extension table on your machine so that your rug is laying flat as you add your rows. You can also use books and other objects to keep your sewing surface flat as you work.
- Washing: You can wash your rug by hand or in a washing machine on cold water and delicate if you have that option. Lay flat to dry.
Supplies:
- Jelly Roll Rug Pattern by Roma Quilts
- Jelly Roll of your choice!
- 16/100 Denim Needle
- Fusible Fleece or Quilt Batting
- 50wt Aurifil Thread ( Doesn’t have to be Aurifil, but I wouldn’t use a lighter weight thread)
- Panasonic Cordless Iron (Or any steam iron!)
- Optional: Best Press Starch (This can help with reduce waves!)
- Optional: Wonder Clips
- Optional: Walking Foot for your brand machine if you have one (I didn’t use one, and so I think you can get away without one, but if you have it, why not use it right?)
- Gingher Scissors
- Olfa Rotary Cutter
My Sewing Machines:


I hope those tips help and I would love to see your projects! If you post them on social media make sure to tag Roma Quilts and myself on Instagram so we can see what you’ve made!
Note: I’ve had so many questions about the quilt on the wall behind me! The barn blocks are from Lori Holt’s Farm Girl Vintage book, and the baby pig, cow, and cat blocks are Lori Holt as well and can be purchased from Fat Quarter Shop.
Thank you so much! I have had this pattern for a while but have been too afraid to start. Your video has helped so much, starting it tonight!
You’re welcome, hope you enjoy the pattern it’s really a fun project!
WOW really. So there might be a little advertising, so what. It was a very nice demonstration and I learned alot. Can’t wait to start making a jelly roll rug thanks to Mrs. Arndt. Thank you for making it very easy to follow.
And to Beckys comment, I hope you wake up on the right side of the bed next time and may God bless you with happy thoughts and a better day.
Thank You again Erica
Hi Erica!
I shared this post on my FB page.
robin 😊
https://www.facebook.com/pg/HVMpdx/posts/?ref=page_internal
Thank you. I’m making a rug now with my strip scraps.
What jelly roll fabric did you use? Is it a Bonnie and Camille jelly roll? If so, which one ? Thanks!
I used Vintage Picnic by Bonnie and Camille 🙂
Thank you for the wonderful tutorial ! Can you tell me the size of your extension table? I got a new machine and am contemplating getting an extension table instead of a table with insert. I’m not sure what size table would be good for quilting free motion and with rulers. My machine has 10” to the right of the needle (Bernina 740). 😊 thank you.
Hi! I have a Sew Steady Extension table on my Juki G-210, it’s this one: https://amzn.to/2LEHQjm
Hi there!
I love the rug you are picturing at the top of this page. What material is this? It looks different than the vintage picnic that you said you used in the video tutorial. I just love the one that is pictured on this main page with the navy on the outside and red towards the middle! Thanks!
The first one I made that is light blue, green, tan is Nest by LellaBoutique for Moda, isn’t it pretty! The Navy with red on the center is Vintage Picnic by Bonnie and Camille for Moda.
I am having difficulty zigzagging my tubing together. My machine (Janome DC3018) is skipping stitches on the right side of the zigzag. I have changed needles (size 14 and 16), changed threads (40 and 50), cleaned the bobbin case thoroughly, and shortened my stitch width. I also spoke with my LQS where they had similar problems. Any suggestions?
Mine did that as well initially, make sure you adjust your tension and also using a denim needle can help.
Are you limited in size? I’d like to make a very large rug for my living room. I see most of the jelly roll rugs are smaller ovals. Is this possible or should I look at alternative rug styles?
You can make them any size you like 🙂
Can you join the batting to the strips while your joining the strips?