
Last week I shared a video tutorial on how to make a DIY Face Mask with elastic straps. Since then I’ve had hundreds of requests asking how to make a face mask with fabric ties. So today I’m showing you how to add fabric ties to your mask.
Please keep in mind these masks will not prevent you from getting a respiratory illness, however they can be used to keep someone who is sick from spreading germs while coughing and sneezing.
In some areas, they are also being used by medical professionals over the top of their N95 masks to help make them last longer. Currently, the supply of surgical masks is at a critical all-time low throughout the entire nation. As a community of sewists, this is a great way we can band together and make a huge difference in this time of need!
Watch my How to Sew a Face Mask with Fabric Ties here:
Download the FREE HOW TO SEW a FACE MASK PDF pattern here!
Handmade fabric masks are NOT a replacement for medical grade masks. You can read more from the CDC here on the use of homemade masks.
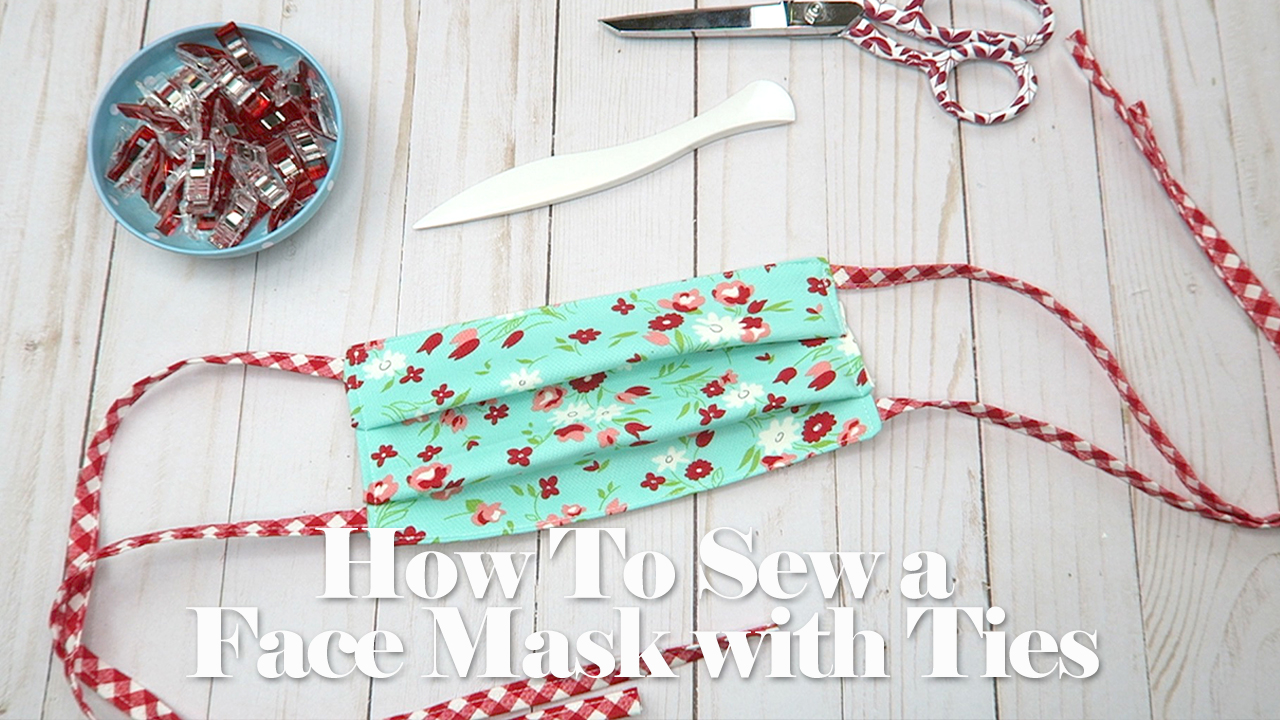
SUPPLIES FOR THIS PROJECT:
- 2 pieces 100% cotton fabric 6″ x 9″
- 1 piece 100% cotton fabric for lining 6″ x 9″
- 4 fabric strips 1-1/2″ x 18″
- Cotton Thread
- Juki TL2000 Qi
- Oliso Pro Smart Iron
- Creative Grids Ruler
- My favorite Scissors
- Clover Wonder Clips
ALTERNATE SIZES: (Use same size of ties for all sizes)
- Kids: 5″ x 7″
- Adult Female: 6″ x 9″
- Adult Male: 7″ x 9″
To make fabric ties, cut a strip of fabric 1-1/2”x 18-20”. Fold one short end 1/4” in and sew. Next fold the fabric strip long edges in so they meet in the center then fold in half lengthwise again. Sew down the open edge to secure. Place the tie with the raw edge next to the corners of the mask just like the elastic is shown in the video. Tip: Make sure not to sew over the loose end of the tie as you sew around the mask.
*** Please wash thoroughly after each use! ***
Tip: Use tightly woven fabric, or hospital grade material. Keep in mind men and women will be wearing the masks when choosing fabric for masks that will be donated.
With the current shortage, I suggest contacting medical facilities in your area to see if they are in need and if so use your skills to help serve our community in this way!
I hope this tutorial can help some of your families and give you a way to give back and help in this time of need.
When considering the inside/outside of the mask, could you reverse one of the pieces instead of sewing right sides together? Keeping the design on the outside would be an easy visual reminder. Anyone know of a reason this wouldn’t work?
I’m not sure if I fully understand your question, but you will still want to sew the fabric right sides together so that when you turn it right side out as directed, the printed side of the fabric is facing out. I do suggest using two different prints so you can tell which side goes by your face.
Karen – I do keep the reverse-side out on one side of the mask for exactly that reason – to be a visual reminder of which side the wearer had against their face. It is counter-intuitive to the standard sewing practice of “right -sides together” but it works for me.
I think it would be easier to just use two different fabrics, I tend to use a lighter color for the face, then a darker color for facing out. That said, if you only have one pieces of fabric and need to make it work I don’t see why you couldn’t sew them both going the same direction and put the wrong side by your face.
I just make mine with a different fabric on the front and that back. That way it’s easy to know which side was next to your face (and it gives you two options for color instead of just one :)).
Great Tutorial! Thanks!
Great tutorials! Thanks for adding the one with ties.
Thanks ! I too found your explanations simple and clear.
A bonus in light of the fact that I have so many friends and family needing them!
So easy to do. I wish i had the wonder clips but hey the instructions were the best and my mask was done in a tick. Thank you
I find using unbleached muslin for the inside (against the face) is easy for the child to remember which side is which.
When doing the 3 folds on the male mask, do you change the width of each fold from adult female mask? I understand the female mask should be 3” top to bottom of the completed mask. Measurement should be what for adult male mask?
I just try to make them even 🙂