I’m not going to say that I’m a great at canning. This is only the 3rd time I’ve done it, but as far as I can tell it’s fairly easy as long as you follow directions!
And as long as you have a helper…
I suggest an adult helper…
One with good stamina for peeling lots of fruit.
If you’re making fruit that is.
So what do you need to can? (I got most of my supplies at Wal-m*rt in the canning/kitchen section)
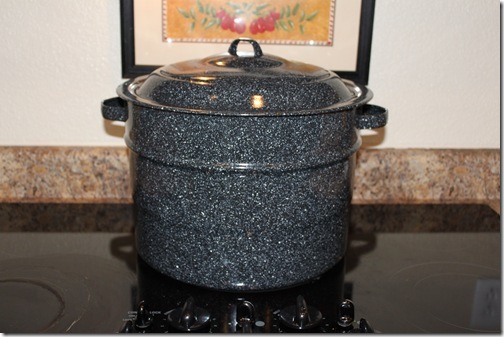
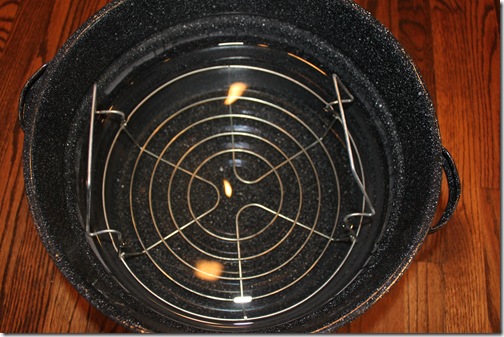
- A Canner (Basically a big pot with a rack in the bottom to keep the jars from touching the bottom during canning)
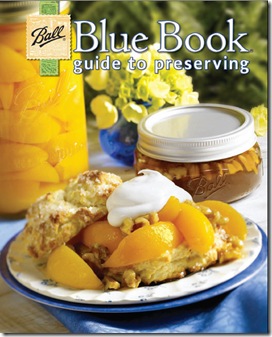
- A Recipe Book, I recommend the Ball Blue Book: Guide to Preserving
- Some jars, lids, and seals
- A Canning Set (Yes, you need this, the jars are VERY hot and you’ll use all the tools in the kit)
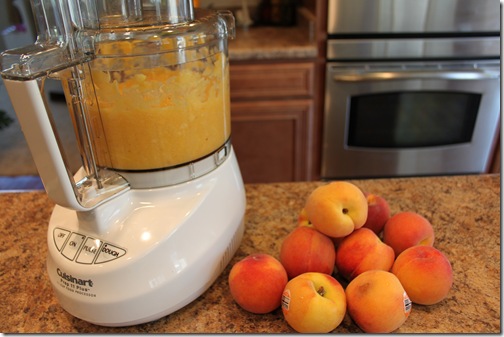
- Food Processor, we used a Cuisinart (This is optional depending on what you’re canning)
- Ingredients based on recipes you choose, you can get pectin and other canning ingredients in the Canning section as well.
Where to start?
I started by gathering some recipes from the Ball Blue Book: Guide to Preserving (I bought mine at Wal-m*rt in the canning/kitchen section, yes, they have one). I HIGHLY recommend this book, it has tons of well tested recipes in it, and as long as you follow the directions exactly you should be all set! I suggest going through this book first, once you pick your recipes, it will be much easier to go shopping for supplies.
Please Note: If you come away from this post with just 1 thing, let it be to follow the instructions! If not, you could give your family botulism, and I highly doubt they’ll be happy about that.
I also highly recommend having a Food Processor, we used my mom’s Cuisinart. This is critical for any type of fruit sauce or fruit butter. If you have a good blender, that may work, but you’ll need to puree your fruit and things like apples can be kind of hard to do in a blender.
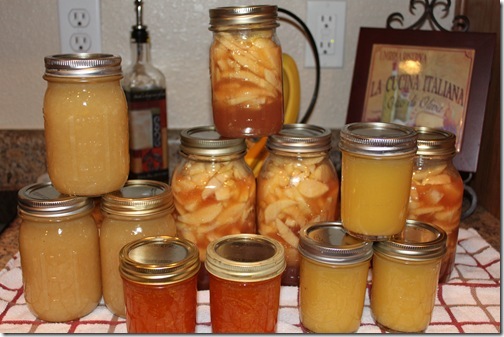
I chose several recipes that looked good and feeling ambitious we tackled several things in one day. Looking back, I’m thinking it may have been better to make one type of thing per day, but you live and learn. Thankfully my mom came up to help, we made:
- Apple Sauce
- Apple Pie Filling
- Apricot Butter
- Pear Butter
- Peach Jam
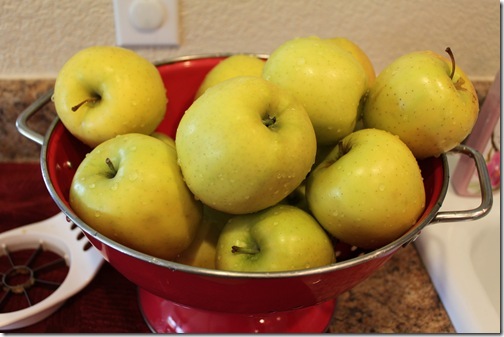
We peeled apples, then some more apples, then some more. And by “we” I mean “my mom”.
We peeled peaches, then more peaches, then some more. And by “we” I mean mean me.
We also peeled literally pounds of apricots…and by “we” I mean my mom. They were so tiny, and it took so many to get one batch of apricot butter, but that was my absolute FAVORITE recipe we made that day! It is so yummy, we’ve been putting it on everything!
What’s the Process?
After picking recipes, you’ll want to go shopping. We gathered all the required fruits for our recipes in one trip. I know it will seem like you are buying a LOT of whatever it is you’re canning, but like I said, follow the recipe. Especially for fruit sauce and butter, it will reduce quite a bit and you’ll end up with much less final product.
As far as the day, I suggest picking a day when you have a good chunk of time to can and like I said, a good helper. It took us all afternoon to make the things that I listed above and we started early! It was definitely easier with 2 people as well. With one peeling and cooking, and the other manning the canner, I think you have 2 full time jobs.
Step By Step:
- I started off by getting my canner going, it takes awhile to boil all that water, so you’ll want to get it started early. Fill your canner with enough water to cover your largest jar by a few inches, and set your burner to Hi heat. Cover the canner and wait for it to boil. (If you’re using a glass cook top, make sure to read your manufacturers instructions to see if it is okay to can on it, you wouldn’t want to crack your cooktop!)
- While your canner is heating, you can start working on your recipe. Once you create your recipe following the instructions in your cookbook, you’ll add the mixture to your jars. The recipe should tell you how much headspace to leave (Headspace is the space between the top of your mixture and the top of the jar rim. You’ll use your measuring/bubble removing tool from your kit in this step.) You’ll want to use that same tool, to remove any air bubbles you can see trapped in your jar.
- Place a lid on the jar, then tighten jar closed with a ring. Now you’re ready to carefully place your sealed jars into the canner. Follow the recipe for how long to leave your jars in the canner.
- Carefully remove your Jar from the canner and place on a dishtowel to cool.
Here is my canner, and the picture below shows the inside. The rack in the bottom is just there to keep the jars from sitting directly on the bottom of the canner. You can make-shift a canner as long as you have these two items.
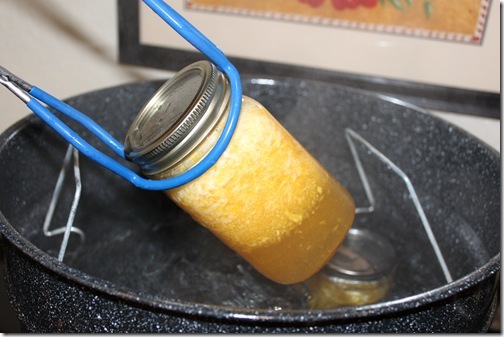
Once your jars are done processing in the water, you can use the tool to remove the jars and set them on a dishtowel on your counter to cool. They are VERY hot at this point, so you want to be careful not to burn yourself.
As the jars cool, you should hear light popping noises as they seal. I suggest removing the ring holding on the lid at this point. It is possible to break your seal if you tighten the lid, so I think it’s just best to remove the ring that way you won’t be tempted to tighten it. I store mine without the rings on, then when we go to use our jars, I’ll grab a ring and use that so I can open and close the jar easily, make sure to store any unused jars in the refrigerator once opened.
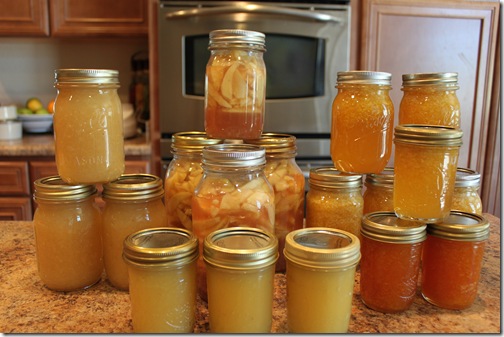
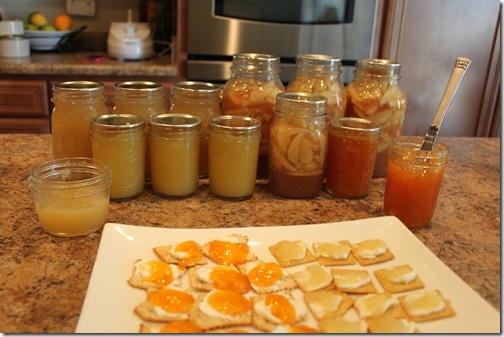
Here is the fruit of our labor…and by “our” I mostly mean my mom’s ;o). We immediately grabbed some crackers, cream cheese and that wonderful apricot butter I told you about! It made for a great snack and all were satisfied. A friend said they put their apple pie filling on pancakes instead of syrup, we’ll have to try that next.
So that’s it! Canning is pretty easy, it just takes a little work. We tackled fruit on this day, our next adventure will be pickles. I hear they take less time though as you don’t have to cook, peel, or puree anything. We shall see….we shall see…
Have some tips to add? Feel free to leave a comment, I’d love to hear them…I’m by no means an expert in this area!


My mom canned when I was a kid, I really want to get into at some point. And I agree that apricots are a pitb! lol I bought some for baby food once, and man….it was very tedious!
I leave the rings on my canned goods overnight/24 hours until they’re fully sealed. *Then* I’ll take them off, wash off the jars (I have a tendency to can in rotation – enough tuna one year to last the next three, enough jam to last the next few years, etc. so I’m not always doing a bazillion different things *each* year).
And yes, it is a bit more difficult when you have kids underfoot and not much adult help. 😉
Good job hun… in New Zealand we call it “bottling” or “preserving” ..not “canning”… you don’t use cans so why is it “canning”?
Long ago cans were used instead of jars, so it was called canning. The equipment has changed, but the term has not. 🙂
Just did a double batch of pears yesterday with my mother in law. First time ever…was great!
If you ever get the chance, look into getting So Easy to Preserve. I reviewed it on my blog here: http://www.mountaineercountrywv.com/2011/06/so-easy-to-preserve.html . I have the Ball book also, but the So Easy to Preserve book is so much more extensive and thorough. Absolutely everything is in it. It’s put out by the U. of Georgia Co-operative Extension office and talks about all kinds of preserving including freezing and drying.
It also explains what is dangerous to can, like pumpkin butter. (You don’t ever want to can pumpkin butter or buy it at local festival….commercial canning ONLY.)
What a productive day, congratulations! Thank you for sharing and encouraging through your posts. Have you used the Ball white plastic storage lids? If not I recommend them, it is so much easier and cleaner (I think) to use those on what is open in the fridge. They come in regular and wide mouth and should be available in the same section at WM.
That looks so yummy! I just made pickles for the first time time yesterday; unfortunately, I wasn’t able to heat process them because I realized too late that my jars were too big and the stores were closed so I couldn’t get new ones. But the ease of it increased my confidence enough that I think (time-willing) that I’ll finally try salsa this year (I still have tomatoes frozen from LAST year’s garden)
Erica,
Great job on canning and encouraging others to try it. It is so rewarding. A couple of tips for you and your readers: peel your peaches and apricots easily by dropping them for around 60 seconds into boiling water, then place them in cold water to cool, the skins will slip right off if they are fresh enough; I also sterilize my jars and heat them right before filling them. You can do this by washing them in your dishwasher so they are hot when you fill them or drop them in your canner’s boiling water just before filling them. Lastly, when making applesauce, if you have a wonderful tool called a Victorio strainer, you can simply core your apples, slice them, place them in a large pot to cook them down a little, then send them through the Victorio strainer. The applesauce is pressed out through a grinder of sorts and your skins and seeds are pushed out the end. You can then can or freeze. We love to freeze applesauce as it tastes so good when it is still a little frozen 😉
The boiling water tip also works very well for tomatoes. I do that when I make and can salsa.
Yeah, we did the boil then cold water thing, definitely helped, but peeling the apricots was still tricky! :o) Maybe I didn’t do it long enough?
Love the frozen apple sauce idea, will try that!
I know this might be a little late–but I didn’t peel my apricots and my jam turned out great! My MIL told me that their skins are as tough as a peach so I tried it that way! Also, if you get more apples, apple butter in your crockpot makes your whole house smell yummy and it is delicious! I agree with the strainer suggestion. I didn’t realize that my great v-shaped strainer had a name! But it makes applesauce so easy! Good work!
Julie, your v-shaped strainer is different. The Victorio strainer is also called a Roma saucemaker or food mill. It is even easier to use because it eliminates the seeds and skins for you. You can do tomatoes and other fruits in it.
We did one year of canning from our garden before we moved. While it was a lot of work I think it was well worth it! We are looking forward to planting a garden at our new house and starting again.
By the way I wanted to let you know that I linked you from our blog! We just recently switched over to homeschooling and totally used your schoolroom as a guide!
Wowee! Great job canning all that in one day! I’be been canning for a few years but have only tried a few things. (Apple butter, sliced peaches and peach, strawberry, blueberry and blackberry jams.) When doing apple butter, I use an apple peeler/corer/slicer that I got as a gift. It clamps onto a stand or directly onto your countertop. You place your apple in, turn the handle and it peels, cores, and slices in one step. Mine is Pampered Chef brand but I’ve seen other (much less expensive) styles at Wmart. It’s been a lifesaver! I also cook the apples down in my CrockPot and then puree down to “butter” texture with a hand blender (also called stick or immersion blender). These tools are not necessary but if you make very many batches of apple butter like I do, they are absolutely invaluable. Thanks for all of your informative posts. Happy canning!