

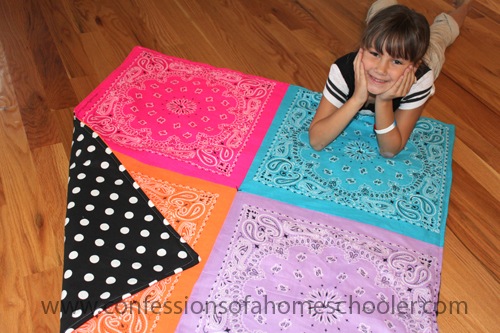
Looking for a fun DIY project for your kids this fall? Look no further, this DIY bandana quilt is perfect for your young crafter.

These were super easy to make and I loved the way they turned out! I will say that Strawberry Shortcake (11) was able to do pretty much everything on her own. I helped Tinker Bell (8), though she did most of her own sewing. And then I sat with the Teeny Tot on my lap and helped her sew everything.
So I would say it is a great DIY project for kiddos 8 and up.
Ready to get your craft on?
Let’s get started!
Supplies:

- 4 bandanas or 4 pieces of fabric approx. 20”x20” (You can get bandanas for $1 at Walmart or the Dollar Store)
- 1 1/2 yds. of fabric for back side (We picked a pattern, but you can do whatever you like.)
- 1 1/2 yds. batting (We used the thinnest one we could find, see picture below. And I prefer the natural material to the synthetic.)
- Coordinating Thread
- Scissors
- Coordinating Embroidery floss (We just used some from our stash.)
- Embroidery needle
- Pins
- Iron
- Sewing machine
Variation: You can make this quilt a bit longer by adding 2 more bandanas, just make sure to get about 2 yds of your back fabric and batting.
Directions:
Step 1: Take 2 of your bandanas or fabric squares (we’ll call them bandana’s from here on out) and set them down on top of each other right sides touching. Carefully pin along one edge of the squares to hold them in place.

Repeat this step with your other two bandanas like below.

Step 2: Next stitch along the edge leaving about 1/4” hem line. Repeat this step with the other set of bandanas.
Your child should be able to do this since it’s straight stitching, but if they’re younger you’ll want to help them guide the fabric through the machine. You probably want to have a discussion about the needle and let them know to keep their little fingers out of the way before starting. Strawberry Shortcake, age 11, sewed her own, and I helped the other girls.

Step 3: Place the bandanas on a flat surface, and press open the seams using a warm iron. Do this for both sets of bandanas.

Step 4: Next open the bandana sets and lay them on top of each other right sides touching. You’ll want to make sure the center seems are as lined up as possible (see below) so when you stitch them together you end up with a nice join in the middle.
Pin along this edge of the bandanas like you did in step 1.

Step 5: Sew along the pinned edge leaving about 1/4” seam. Our bandanas weren’t exactly straight so we just did the best we could. You could cut them prior to sewing if you want them exact.

Step 6: Press open the seem using your iron, like you did in step 3.

You should now have all 4 bandanas sewn together like so…

Step 6: Next lay out your batting on a large surface, top it with your back fabric right side up, and then top that with your stitched bandanas wrong side up. That is to say the right side of the fabric and right side of the bandanas will be touching, with the batting on the bottom layer like below. Carefully cut around the edges to trim off any excess batting and back fabric.
Pin along all 4 sides of the quilt leaving an 8” gap along the center of one side so you can turn the quilt inside out. It’s best not to leave your opening on a corner, however we did by accident and it still worked okay. It’s just a bit harder to get the seem straight.

Step 7: Sew along the edges of your entire quilt, again leaving an 8” opening for turning.

It’s okay if your stitches aren’t perfect, this will get covered up later on. Plus it’s a project that your child will be doing themselves and the little imperfections will make it their own!

Step 8: Next trim off the corners at a diagonal being careful not to cut the stitching. This will make the corners much sharper when you flip it inside out.

Step 9: Next reach into your opening and grab the farthest corner and carefully pull it through the opening. Be careful not to tear your stitching, so just take it slow until the entire quilt is turned inside out. You should now have your batting inside, with your bandanas and back fabric on the outside with their right sides showing.

Step 10: Using a pencil or scissor tip, push the corner fabric out so it is nice and sharp.

Step 11: Next carefully fold in the edges of your opening to form a 1/4” seam and pin it in place. We will be stitching around the entire quilt one more time, so it will sew your opening together.

Step 12: Next stitch around the entire quilt leaving about 1/4” seam like below. This will secure any loose seams as well as close up your opening and give your quilt a more finished look.

Step 13: Finally, grab some coordinating embroidery floss, a needle, and some scissors. Cut off about 24” of the floss and then thread your needle doubling up the floss. We used all 6 strands of the floss because we liked how it looked, but you’re welcome to use less if you prefer.

Sew 1 stitch into the center of one of the bandanas making sure to catch all 3 layers of fabric.

Tie your stitch into a simple knot and cut off strands leaving about 1/4” or whatever you find visually appealing. Repeat this step in the center of all 4 bandanas and in the middle of the quilt where the four bandanas come together as well.

And that’s it! Super easy and fun, and your child now has something awesome they created on their own!

And if you have a crafty youngster in your house like I do, you might even see one of these getting created from the leftover pieces of fabric! This was a little something Strawberry Shortcake whipped up for the Teeny Tot.
She simply cut a large rectangle and folded it in half. Then she sewed a seam at both ends. Next she stitched up the sides, and sewed on a handle. Simple and cute, I love to see what they make with their scraps!

These quilts are also great for gifts, and since you make them yourself you can customize them to the recipient!
I hope you enjoy this tutorial, and if you decide to make one send me a pic or leave a comment, I’d love to see what your family creates!
Oh, this is cute! Maybe we’ll do it next summer. We haven’t used the machine together yet, though we made our own little blanket. This is how I taught my daughter to sew. http://www.thissimplehome.com/2013/01/teaching-my-child-to-sew.html
Oh, I LOVE the idea of drawing lines on there for them to sew. Keeping a straight seam is kind of an abstract concept for kids, but that’s a great idea! TFS!
This is so simple and cute! Thanks for the tutorial!
Hi! What stitch length do you use, especially when you’re sewing through all the layers around the edge of the quilt?
I usually go with a 3.0 stitch length for that.
I chose to do the bandana quilt. So far I have had it apart three times, and have decided the next time it comes apart, it’s gone.(Pretty discouraged). I want to use the sewing machine, not hand quilt. How did you prevent the batting getting stuck in the feeder, or presser foot? I have the bandanas all together, put the batting on the first (red) bandanas. Pinned the batting to the wrong side of the red bandanas . Can you tell, I am not a sewer? HELP!!!!
Thanks, Margaret
Hi Margaret,
I’m sorry you’re having such a hard time. If the bandanas are coming apart, you may be stitching too close to the edges, or your stitch length might be too long. I set my machine at about a 2-2.5 stitch length. If your batting is getting caught in your feed dogs, you might want to flip the whole thing over and sew the layers together with the batting on top instead of on the bottom. That way it’s just going along under the presser foot and not touching the feed dogs if that makes sense. Mine didn’t have any issues as far as getting caught in the feed dogs though.
Is there anything that you can add besides the floss in the center of each piece? What is the purpose of it? Can you stitch something with the machine instead? I have never made a quilt before and would love too try this
The floss in the center is for decoration but mainly to keep the batting in the middle of the bandanas in place when it is washed. If you don’t want to do the tie quilting you can do machine quilting to keep it in place as well. If you’d like to learn how to quilt, you might want to check out my How To Quilt series: http://www.confessionsofahomeschooler.com/blog/category/how-to-quilt
I’m doing this as a twin-size quilt for my son to take to college. When I’m sewing my 3 layers together, do I still leave only an 8″ hole to turn right-side-out, or should it be a little larger? For reference, I’m using 22″ bandannas, and my quilt is 3 bandannas wide by 4 bandannas long. Thank you!
So that’s much larger, but you still only need about a maybe 12-18″ gap to turn I would think?