
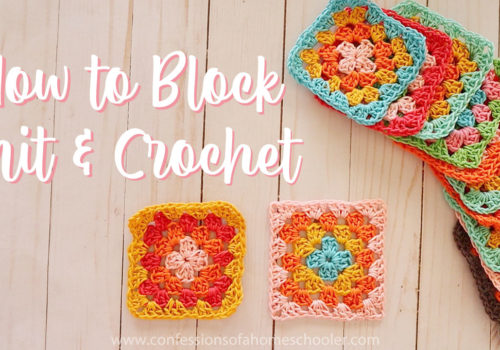

Blocking your knit and crochet projects is such an easy part of the process, and it can really change the look of your finished project!
I don’t always block my finished pieces, and as a matter of fact, I used to ignore instructions telling me to block my finished pieces! But honestly, it doesn’t take very long at all, and it can definitely be worth it! Let’s talk a little bit about blocking, shall we?
What is Blocking?
Blocking is a way to shape your completed knit or crochet project to give the fabric a more structured and finished look. Blocking can even out your tension and really show off all of your hard work especially those delicate stitches! It can also improve the drape of the fabric, and sometimes even increase the size of your finished project if needed.
Blocking your gauge swatches is a great way to help ensure that your finished project ends up the correct size. This is extremely important when creating garments that need to fit!
While there are numerous ways to block an item, it is typically done by pinning your project to foam blocking boards using rust-resistant t-pins into the desired shape. Next, you will add moisture (water or steam) to the yarn, then waiting for it to dry. Things like socks and hats can be blocked on head-shaped, or foot-shaped blockers to achieve their finished shape. Though I have to admit, I don’t usually block socks or hats. Wearing them seems to do the trick!
Blocking Supplies
- Foam Blocking Boards
- Quilter’s Cut ‘n Press
- Rust-Resistant T-pins
- Spray Bottle + water
- Oliso Pro Smart Iron
See How to Block Knit & Crochet projects here
Soak Blocking
Soak blocking is a type of “wet blocking” which involves completely submerging your item in cold or lukewarm water. After getting the project completely wet, I like to lay it on a towel, then roll it up and press the moisture out with my hands. Do not wring the item, instead gently squeeze the towel. Then unroll the towel and shape your project as desired on foam boards or by laying it flat on the towel to dry. Note: This method doesn’t work as well with acrylic fibers as they tend to be water-resistant.
Spray Blocking
Spray Blocking is another method of wet blocking, sometimes referred to as “spritz” blocking. This is the method I will demonstrate in today’s video tutorial and my “go-to” method for most smaller projects. To steam block an item, you will pin your item to the foam blocking boards using t-pins. Next, spray the item using a water bottle until it is damp, but not totally soaked. Once the item is fully dry, usually overnight, you can take it off and it’s ready to go! You can use Spray blocking with either acrylic or natural fibers, but it works better with natural fibers. If you have acrylic yarn, I suggest steam blocking below.
Steam Blocking
Steam blocking is sometimes referred to as “dry blocking” and it is great for acrylic yarn projects. In this method, you will pin your project to foam boards, again using t-pins. Next, you will steam the item by hovering your iron over the project while pressing the steam function on your iron. DO NOT touch the yarn with your iron or you will melt the fibers. The heat and steam moisture will help the fibers relax into the proper shape. Give it a good steam, then allow it to dry/cool completely. This method works with either acrylic or natural fibers.

And that’s it! Blocking is so easy, I encourage you to give it a try and see what you think! I know the first time I blocked something, I thought, “Wow! It looks like I bought it from a store!” Blocking can really give your finished item a professional look if that’s what you’re going for. Some projects I intentionally don’t block so they have a more rustic and hand-made look to them. It’s all about personal preference, but hopefully, you have learned something new today!
Happy making!
How to learn knitting and crochet