

I’m so excited to try a new history unit this year! While we’ve used Abeka in the past, and it’s been fine, I really wanted to have a little more fun this year and do something out of the box. Sometimes you’re just ready for a change!

After careful consideration we’ve chosen to go with the Homeschool in the Woods Middle Ages unit to start with. We’ve done several years of United States History and it is time to start looking into some world history.
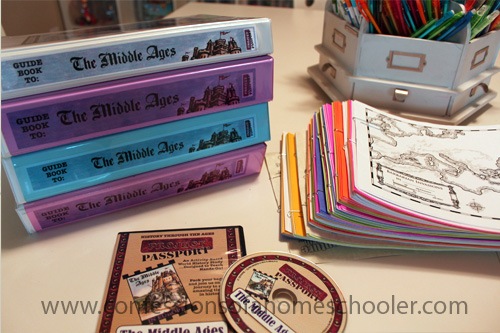
We haven’t started yet, but after looking through it and getting everything ready I wanted to share some of my first thoughts on the curriculum as well as how we set it all up.
–> And make sure to read to the end, because I have a great giveaway for you too!
First Impressions:
My first impression of this curriculum is that it is going to be lots of fun! It is very hands on, and we love lapbooking and notebooking over here, so it’s a great fit for us. The activities look engaging and the text is definitely thorough but not boring. For every lesson there are several different activities you can chose from. I don’t plan to do absolutely everything they included (and they include a LOT of activities), but we did go through and pick out which ones sound most do-able for us.
My second thought is that it is very thorough! They have definitely done a lot of research and work to make this curriculum not only detailed, but enjoyable. Definitely NOT your average dry and boring history curriculum.
The majority of activities are lapbook or notebooking related, so they don’t require much more than paper and cardstock. There are however lots of other recipes, crafts, and games included that make it look like a lot of fun!
I would also like to mention that the artwork included in this unit is awesome, and the instructions are VERY good. It is clearly evident that they put a lot of time and effort into creating this curriculum.
Organizing the Middle Ages History Unit:
One of the first things I noticed when I first popped in the CD, is that it was a little overwhelming. But once I figured out their setup it wasn’t so bad. And they have very detailed instructions on what to do which helped tremendously.
That said, I set mine up a little differently I’m sure, but I figure if my tips can help you all, then I’m happy to share. So this is how I organized our unit…
Supplies you’ll need:
- Colored Cardstock
- White Cardstock
- Regular Copy Paper
- Lots of computer ink
- 1 (3-ring) binder for you
- 1 (3-ring) binder for each of your students
- I also made a list of craft supplies we will need as I went through the lessons.
Step 1: Organize the teacher’s materials.
The first thing I did was to look over the CD and pick out the teacher’s lesson PDF files. I then printed all of the “stop itineraries(lessons)” and set them aside.
It took a little time, but once I figured out which PDFs were for me everything went smoothly.
Note: One thing to point out is that each of the lessons is a separate PDF. This is probably helpful if you do not plan to do every lesson. However I think for the teacher’s section I would’ve preferred to have one big Teacher’s Manual to print. Instead you do have to print the pages for Stop 1, Stop 2, Stop 3, etc., individually. (Stop refers to “Lesson” in their terms. You know because you’re traveling and making stops. It’s more fun to say “Our next stop is…” than “Today we’re on lesson…” right?)
And here’s my pretty teacher’s binder all done!

Step 2: Print the text/reading pages.
For each lesson there is a reading text PDF that you’ll want to print out. I suppose you can keep this on your iPad or computer, but for me I like having things printed. So I printed all of those in order for each stop and set them aside.
Again all of the lesson text pages are individual PDFs so printing took some time. Thankfully they are all in one folder on the CD so it wasn’t too hard to locate them all.
Step 3: Organize the Teacher’s Binder.
I purchased a 1” 3-ring binder for my materials. Inside I organized them like so:
Stop Itinerary/lesson plan on top, followed by reading text for that lesson, followed by any additional maps and teacher’s keys.
So in my binder it looks like Stop 1 followed by Text 1, Stop 2 followed by Text 2, and so on. I also added any maps or teacher keys behind the text for that stop. That way I can locate them easily. You can see this in the image below.

Next I put divider tabs between the stops and the Timeline teacher’s key. Since they add to the timeline as you go through the lessons, I wanted to have it all in one place for easy reference so I didn’t separate out those sheets behind the lessons like the other materials.

Step 4: Read through each Stop and choose your activities.
As I mentioned before each stop has several activities to choose from. I doubt we’ll be able to do absolutely everything, so I went through and marked the things that I knew I wanted to do for sure. I figure later on if I want to add something in I can.
As I read through the lessons, I also marked the crafts or recipes we plan to try. I also created a shopping list of supplies so I can go get them all at one time. With the exception of recipe ingredients that might go bad, I will go get our craft supplies before starting so we’re prepared.
Step 5: Print Student Materials.
This portion definitely took the longest to accomplish. After selecting our activities in step 4, I went back through the stops and printed materials for our year. Each activity comes with very specific printing instructions. For example one might say:
Print 2 copies of page M-1-1 on colored cardstock
Print 1 copy of page M-1-2 on white cardstock
Print 1 copy of page M-1-3 on copy paper
So I followed their instructions exactly, and printed enough materials for all 3 of my kiddos participating. The Teeny Tot will participate in some of the crafts, recipes, and games, but she won’t be expected to do a notebook.

You might consider printing as you go so you don’t waste materials if you decide not to do something. But I find that we get so busy during the year, I really don’t have time to do a lot of busy work like printing.
So for me, it’s just easier to print ahead of time. Plus if I have it ready to go I’m much more likely to actually do it.
Step 6: Organize Student Materials.
Next I went through and sorted all of the items I just printed in step 5. Anything I knew would be added to their student binder I 3 hole-punched just so it would be ready to go.
I then stacked the pages together in order and paper clipped 1 lesson’s worth of print-outs for all 3 of my students together in one bundle. So it looks like this now…

Step 7: Set up the Student Binder.
The next thing I did was set up the student binder. Each one of my kids will get their own binder. There is an option for a lapbook at the end of the year, and we may put one together, but for now we’ll keep our materials in their binder, and I’ll probably have them add the mini-book activities to their binder as well, maybe just glued to a piece of cardstock and inserted into their binder. We’ll see as we go.

Just to make life simpler, I also prepared a couple of things I knew would save us time as we went through the lessons.
The Newspaper: One thing they add to throughout the year is a newspaper. So I went ahead and printed the newspaper pages and stapled them together so that when we get to those lessons I can simply have them add their article to the newspaper. At the end of the year, they’ll have a completed paper!

Post Cards: I also premade the postcard holder. For each lesson they’ll be adding post cards to it, and I decided that the holder would be easier to have done ahead of time. That way they can focus on creating their post card, and not having to make the holder.

Timeline: I also printed their timeline and added it behind the post card holder as well. This way they can add their timeline figures to it as we go. They are the blue pages behind the green post card rack in the above photo.
So what started out looking like this…

Now looks like this…

Make sure to hang on to the CD because there are listening/audio activities as well and you’ll want to keep your CD close by.
Total Prep Time = 1 Day
I definitely spent an entire literally FULL day printing and organizing all of this material. But I think all of the prep work will be worth it.
I’m hoping it will make our year go much smoother and now that it’s done, we’re all ready to get started!
And of course, I’ll be sharing posts on our progress through this curriculum and a more formal review later on with our experiences.
–>> Learn more about Homeschool in the Woods products here!
–> GIVEAWAY!!!!
Of course if you know me at all, you know that I have a giveaway for The Middle Ages unit for one of you today too!
They all look great but probably New Word Explorers.
Such a hard decision… they all look great! I think The Middle Ages or New World Explorers will do! Thanks, Erica!
Time Travelers American History Study: The Civil War
I want to do all of them. Planning on Middle Ages and Renaissance and Reformation this year.
Are the student binders 1 1/2″?
Thank you so much for sharing how you organized this! It seems very overwhelming when first popping in the cd, but now that I understand how it is set up and organized it is actually brilliant. Your blog is one of my favs. 🙂
Do you have an update on how this program worked for you? How much time each week it took to complete?
Hi Rebecca,
We are loving it! YES, the CD is overwhelming, that’s why i did the post on how I organized it to help out. Once you get everything printed, it is really easy to do during the year.
I sooooo love your website. My children are in public school, but I find your website very helpful and encouraging. Even to me, someone that doesn’t homeschool. I am planning on doing the Ancient Egypt study this summer. I let my son pick the topic, so hopefully he gets into it. Thank you for sharing how you organized everything. I can’t wait. I might just start before the summer…LOL